Here’s your quick guide to building your own console emulator! In the last decade, we have witnessed an increasing interest towards retrograming. We have of course great modern games nowadays, and impressive quality of graphics and AI behind them. However, many gamers cannot stop thinking about a Game Boy or Super Nintendo Entertainment System (SNES) with a certain degree of romanticism. It’s first love – you never get over it.
Although playing on an old console is usually much funnier, many consoles are not easily available nowadays, so gamers often rely on emulators. But for the many gamers that are also developers, a question arises: how are emulators developed? Is it easy or not? Can I build an emulator?
To answer these questions, Marco Cuciniello, CTO at Becreatives, delivered a very interesting speech during Codemotion Rome 2019, explaining how emulators work and how it is possible to implement them. While this usually requires performant low level languages like C or C++, for the sake of clarity he explained how to develop a very simple emulator in Python.
What is an Emulator

Basically, an emulator or console emulator is software that is able to read and interpret the content of a game file, also known as a ROM, containing all the business logic of the game. Such ROMs are usually read from cartridges or CDs, and dumped on files to be easily portable and distributable. What a ROM contains is a set of instructions in machine code (easily converted in Assembly, if needed), representing the whole game.
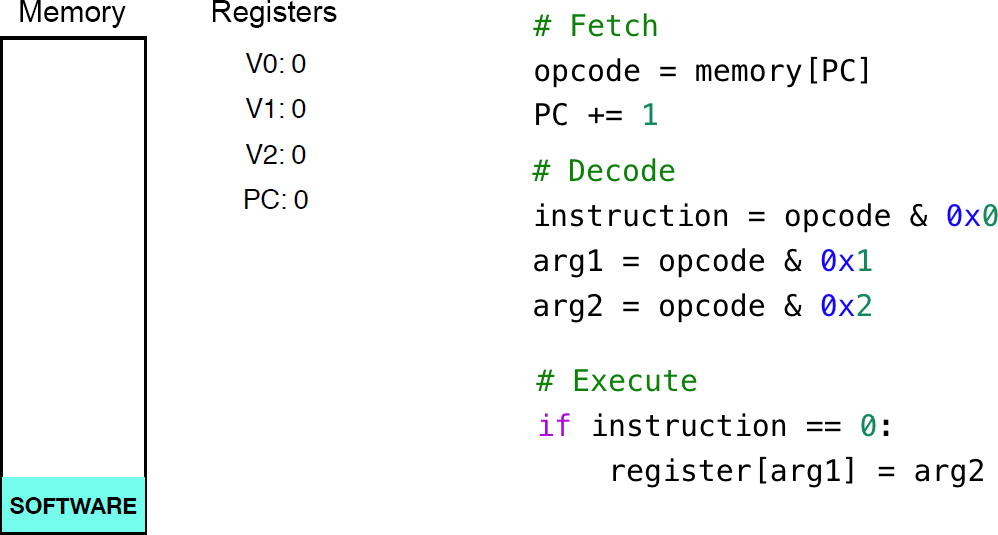
The role of the emulator is thus to act as a computer, implementing a virtual CPU (with the well-know fetch-decode-execute cycle), memory and registers (including both data register and the program counter). Memory can be implemented as an array, registers are variables and all the instructions need to be read and decoded, before finally being executed.

When you have to develop an emulator, the first thing you have to do is thus to understand the architecture of the machine you are trying to emulate. This is not so easy, but a lot of information can be found by looking on the Internet. For instance, you will need to know the instruction set, the number and type of registers, as well as the size of the memory. All this information is crucial to correctly implement the final console emulator, since the instructions are all based on the same architecture.
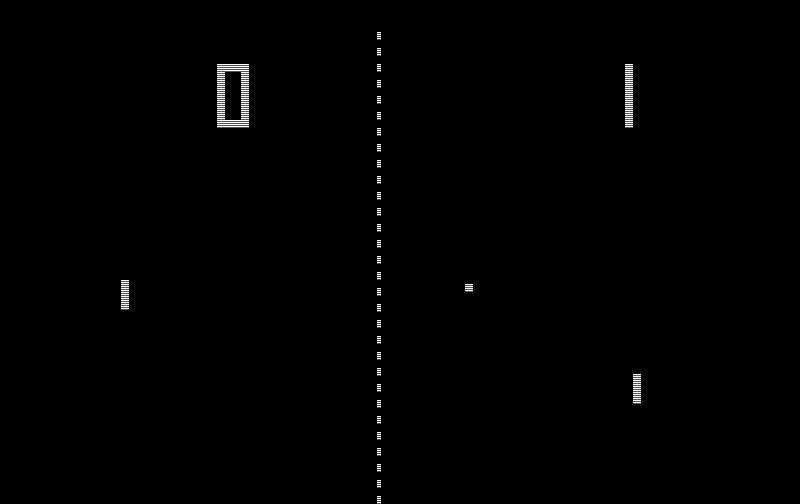
Of course, simple architectures like those of the first consoles are easier to implement. You cannot compare the complexity of a first-generation console like the Ping-O-Tronic with a Sony Playstation! For our purposes, in the following we will consider an extremely simple machine based on the architecture of CHIP-8, a simple virtual machine that has been widely used for didactic purposes and that can run very simple games. A CHIP-8 machine is based on 2-bytes instructions, 16 8-bit data registers named from V0 to VF and a memory of 4096 8-bit locations. The full technical reference for CHIP-8, including the instruction set, is available at this link.
A CHIP-8 Emulator in Python
During his talk, Marco Cuciniello explained how to implement an emulator for the CHIP-8 architecture using Python. Of course, a proper implementation would require a more efficient programming language, possibly compiled and not interpreted, like for instance C or C++. As explained in the introduction, the rationale behind choosing Python is to exploit its readability and simplicity.
Memory
Implementing memory is probably the simplest thing to do here. We just need a list of 4096 values, which is just a single line of code in Python:

The previous scheme shows another interesting detail: software data is all stored between the memory addresses 0x200 and 0xFFF. Consequently, we need to load the content of a ROM to the proper memory section.
def load_rom(self, path):
    rom = open(path, 'rb').read()

    for index, val in enumerate(rom):
        self.memory[0x200 + index] = val
Code language: PHP (php)
Registers
Once the use of memory is clarified, it is important to look at how to implement the registers. CHIP-8 requires 16 8-bit registers, which can be implemented as follows:
V = [0] * 16
In addition to these, there are other two registers: the program counter (PC) and an additional register (I) used for instructions that involve memory:
PC = 0
I = 0
Instructions
Now that we have clear how to implement memory and registers, we can have a look at the console emulator instructions. The first problem to solve is how to retrieve the next instruction from the memory. We can proceed as follows:
self.opcode = (self.memory[self.PC] << 8) |
self.memory[self.PC + 1]
Code language: PHP (php)
The instruction is thus saved in self.opcode. To use it properly, we need to decode it, which means that we have to understand what it means, and execute the proper actions. CHIP-8’s instructions are made up of 2 bytes and they can have different formats (again, you can find the full list at this link). Generally, the first bits allow us to understand what the instruction should do, while the last bits contain the data (e.g. register numbers or addresses) that have to be used by such instruction.
There are several formats for instructions. For instance, the format for a CALL is 0x2NNN (e.g. 0x22F6), where NNN is the address to be called. Assignment instructions have instead a different format, which 0xXY0, where X represents the destination register number and Y is the number of the register that contains data to be assigned. Other instructions have a format like 0x3XNN. The following lines of code allow us to split the instruction in the different fields that compose it:
self.arg_x = (self.opcode & 0x0f00) >> 8
self.arg_y = (self.opcode & 0x00f0) >> 4
self.arg_xnnn = self.opcode & 0xfff
self.arg_xxnn = self.opcode & 0x00ff
self.arg_xxxn = self.opcode & 0x000f
Code language: PHP (php)
Based on the previous variables, we can for instance decode an assignment instruction like 0x8230 as follows:
self.V[self.arg_x] = self.V[self.arg_y]
Code language: PHP (php)
You should see now that implementing all the different kinds of instructions is a very long process and also, if in principle it is not so difficult, it requires a lot of patience and attention, since bugs are around the corner.
Display
One of the most important parts of a game is the management of the display, since it represents the main interaction for the gamer. CHIP-8 required a 64×32 monochromatic display, which can be easily implemented with the help of an external library in our programming language. In the case of Python, we may decide to rely on Pyxel:
def update(self):
    self.display_change = False
    self.fetch()
    self.decode()
    self.execute()
Code language: PHP (php)
Keyboard
Last but not least, we need to provide the gamers with a way to send commands to the game. In other words, we need to use the keyboard, integrating its use in our emulator. CHIP-8’s keyboard has 16 keys (0-9, A-F) that we can map to the key codes available on Pyxel:
keys_dict = {
    0x0: pyxel.KEY_KP_0,
    0x1: pyxel.KEY_KP_1,
    0x2: pyxel.KEY_KP_2,
    0x3: pyxel.KEY_KP_3,
    0x4: pyxel.KEY_KP_4,
    0x5: pyxel.KEY_KP_5,
    0x6: pyxel.KEY_KP_6,
    0x7: pyxel.KEY_KP_7,
    0x8: pyxel.KEY_KP_8,
    0x9: pyxel.KEY_KP_9,
    0xA: pyxel.KEY_A,
    0xB: pyxel.KEY_B,
    0xC: pyxel.KEY_C,
    0xD: pyxel.KEY_D,
    0xE: pyxel.KEY_E,
    0xF: pyxel.KEY_F,
}
Some of the CHIP-8 instructions are aimed at allowing keyboard-based interaction. For instance, 0xE09E means that if a key with a value in V0 is pressed, the control must go to the next instruction. Another example is 0xF00A, which stops the execution until a key is pressed.
The best architecture for a console emulator
Now you should have a better overview of how a console emulator works and how to implement it. Of course, CHIP-8 is probably the simplest architecture that you can implement on an emulator. However, while conceptually simple, creating a fully-working CHIP-8 emulator from scratch is far from straightforward; you will probably need to struggle with debugging and implement a bunch of different instructions. Carrying out a simple project like this is not just a starting point, but it helps in understanding the wide range of issues that are behind the task of building any emulator.

